Stickers are fun to create, right? There are so many fun things that you can create in the form of stickers. These products are decorative, and you can use them for your home decor, festivals, special occasions, or phone covers. Sticker making can never be boring with the ultimate Cricut machine. With the help of this blog, I’ll share ‘how to make stickers on Cricut‘.

I’ll tell you each step included in making a good sticker using your crafting machine. Moreover, you’ll also need a printer to print stickers through your machine. Use an inkjet printer to create stickers. Discover all the steps included in making a perfect sticker.
Step 1: Launch Cricut Design Space on Your Device
In the first step, open your design software and go to the new canvas. You can use your canvas to create a new design or upload a ready-made design from the Cricut Design Space Library.
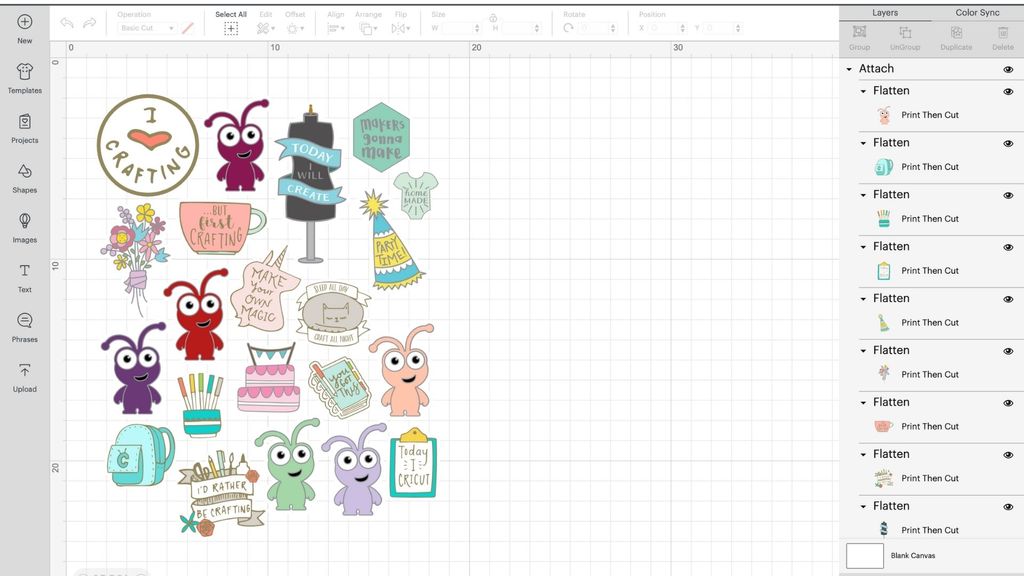
In this method, I usually use the Print Then Cut feature with a size of 6.75 x 9.25 inches. You can also resize your sticker by choosing a square shape from the library and resizing it according to you. Let’s move to learn how to make stickers on Cricut.
Step 2: Prepare Your Printer
Now that you’ve completed the design and adjusted the print size, you need to create a customized sticker. In the next step, choose your machine from the menu and hit the Make It button.
After that, you’ll see a black line around your design. Then, your crafting machine will scan your image and cut it into the exact size. Now, click on the Continue option to continue, and send the image to your inkjet printer.
Once you hit the Print option, choose the Add Bleed option. After selecting this option, the white margin will be removed from your image’s border. Next, you should hit the System Dialog option to confirm your printer’s settings and keep them adjusted to get premium-quality prints.
Step 3: Print Your Design, and Add an Image to Mat
Hopefully, your journey to learning how to make stickers on Cricut is going well. Now, you can print your image using your inkjet printer. You can only use an inkjet printer to continue sticker making.
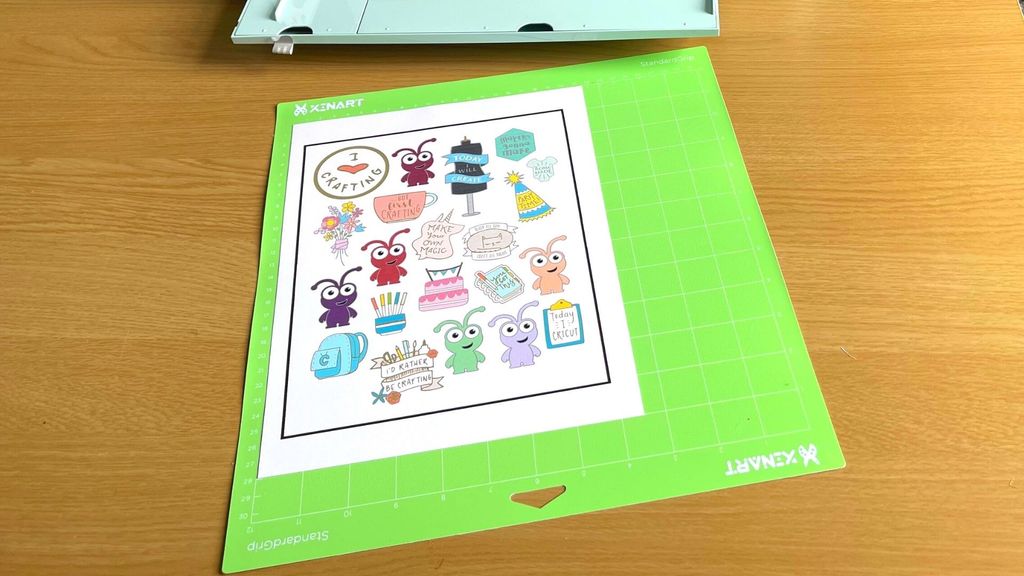
When everything is optimum, just add the material into your printer to the printer and click the Print button.
Once your sticker design is printed, you can add the print to the mat. Make sure that your sheet perfectly aligns with the mat and doesn’t cover the Cricut logo. Using a machine mat is necessary even if you’re using smart materials.
Step 4: Select Your Material and Start Scanning
Once you’ve followed all the steps carefully, you should select the material you’re using. For instance, if you’re using sticker paper or vinyl, select it. If you create stickers quite often, you can click the Start button next to your material, and your material will be added to the favorites.
This option will save you time by keeping you free from selecting the material each time. Finally, load the mat into your machine and press Go.
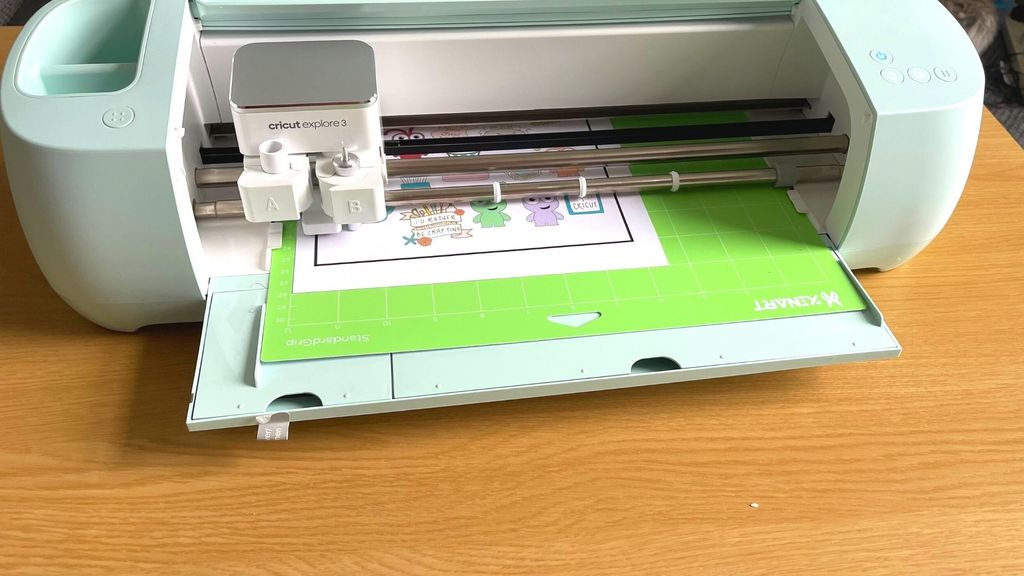
After that, let your machine use its sensors to scan the black lines and cut the images. In the next step, your machine will cut the stickers, and now you can use them anywhere you want.
Tips and Tricks to Troubleshoot Sticker-Related Problems
No matter how well you create your design or follow the steps, you may end up with some issues. Sticker-making with Cricut can be a little complicated. Here are some tips and tricks you can use to fix the issues you create while creating your stickers.
- Ensure that your machine is On and lit to scan the registration marks.
- Then, confirm if the mat is perfectly aligned inside the machine.
- You can also increase the white border around your sticker’s design to fix the issue. Sometimes, low margins may also cause issues in cutting.
- Power cycle your machine. Turn it off, and disconnect its power cord.
- Update the firmware and check it by performing the Print Then Cut feature.
Hence, these are some tricks you can follow to create a well-designed sticker with your crafting machine. That’s it for how to make stickers on Cricut.
FAQs
Is a Printer Necessary for Making Stickers With Cricut?
Not at all! You don’t necessarily need a printer; however, you can use it by choice. You can create a fun sticker with your Cricut and vinyl. There are more fun ways to create the best stickers with your machine without using a printer.
What Materials Do I Need to Create a Sticker With My Cricut?
If you want to create your own stickers with the machine, you need certain materials to get started; check the list here:
- A brand new Cricut machine
- A design software (Cricut Design Space)
- Printable vinyl
- LightGrip cutting mat
- A scraper tool
Can I Use Something Else Instead of Cricut Design Space?
Yes, there are some alternatives to Design Space, like Canva. It’s one of the best tools for creating fun sticker designs. You can use this tool to print your stickers, and then you can cut them using your machine.
Source: How to Make Stickers on Cricut